Using Nextion display with ESPHome
After successfully connecting my gas boiler to Home Assistant I decided to add a physical touchscreen display so that less technically inclined users could operate the system. We also had contractors living in the house throughout the whole winter while they made renovations (this is a typical arrangement in Russia; we were not living there at the same time). I wouldn't expect them to install Home Assistant and get familiar with all my stuff — they just needed a simple interface with minimal amount of buttons.
Choosing the technology
I was always planning to add a display to my thermostat, but I never thought about it in detail. I had a lot of experience coding WPF apps for Windows and even dabbled in some React shenanigans, so UI development was always a pretty high-level abstraction for me. The worst thing I could remember was some hairy MFC/WTL business when I was learning C++ in high school.
But then it dawned on me that making UI for a hardware device might be a little bit more complicated than that. There is no graphical OS, no window subsystem, no button primitives. In best case scenario you can draw lines or rectangles or paint individual pixels. Of course I suspected that some frameworks and higher-level solutions are out there, and they would help me avoid drawing at the lowest level.
After some initial googling and consulting with ESPHome docs, I arrived at two options:
- Use a cheaper general-purpose LCD display like ILI9341 along with some UI framework. This seemed rather problematic since not many of these displays have an integrated touchscreen and bringing a UI framework to ESPHome also seemed non-trivial.
- Use a more expensive touchscreen LCD from Nextion, which is advertised to have an on-board CPU with built-in UI framework, so all you need to do is communicate with it using UART.
As you might've guessed, I chose the second option. I never thought this would be a walk in a park, but frankly I was a little taken aback by problems cropping up on every. Freaking. Step of the way.
Nextion displays
Before I dive into all the details, let's talk about concepts behind Nextion displays. As I mentioned earlier, creating hardware UIs using low-level primitives like lines and pixels is very time-consuming. If a company produces devices for which UI is not a defining feature (like industrial machinery), they don't need to pour money into developing a unique interface. They can make a more generic and a bit clunkier UI and their customers won't mind. And this is exactly the value proposition of Nextion displays. They have a CPU and memory on board and communicate over most common interface — UART. They come preinstalled with a proprietary operating system and a UI framework. You draw your UI in a graphical editor (much like in good old VB6 days), compile a package and upload it to the display. You can use a simple scripting language and incapsulate a lot of UI logic in the display itself. All that is left is to connect the display to your main device through UART and use high-level commands to change UI elements. It's kind of like MVC pattern for hardware.
All this looks great on paper, but don't rush buying a display for your next project just yet. Here are some drawbacks that I found while integrating a Nextion display into my project:
- Nextion scripting language is not really straightforward. It's quite simple, yes, but there were a couple of times when I needed to dive into documentation, which is not always helpful.
- Documentation exists, but it's more of a command reference, rather than a set of tutorials and explanations. Be ready to watch some YouTube videos and spend time reading the reference, especially if you want to do something non-trivial.
- The only way you can create firmware packages for the display is with Nextion Editor which only runs on Windows. There are no open-source projects, just this opaque vendor IDE. If it works for your use case — great, because this IDE is really not that terrible. But if it doesn't work for you, then then there is no other option, but to choose a different technology. I use MacBook as my daily driver and had no problems running Nextion editor under Windows 11 in UTM.
- Integrating Nextion display with ESPHome is no walk in the park either. All those fancy sensors worked most of the time, but when they didn't, they randomly corrupted their states which completely jumbled the whole logic of the thermostat.
If all those caveats are acceptable for you use case, then by all means try those displays in your project.
Drawing the UI
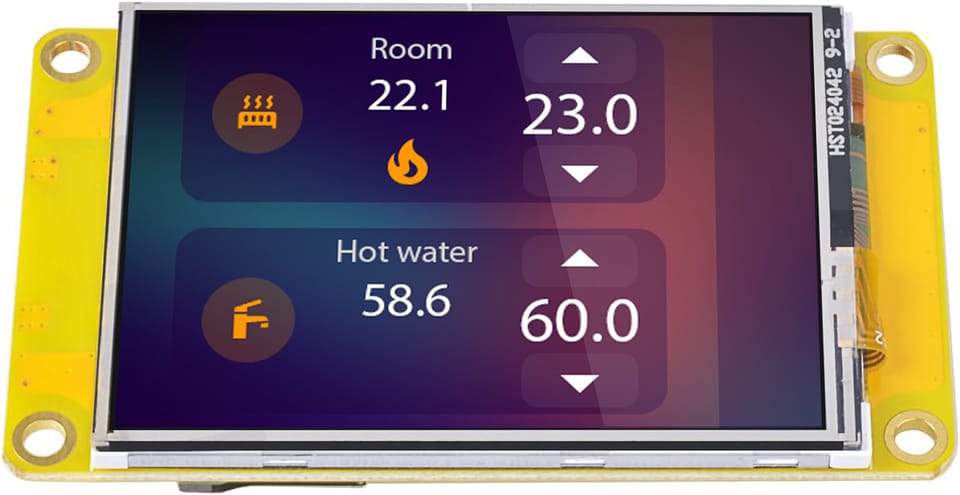
It's easy to be blown away by all the slick demos that exist on the net for Nextion displays. When I first saw them, I thought that all those translucent buttons and futuristic gauges are part of Nextion framework, and all I need is to install Nextion Editor and start creating some crazy-ass thermostat UIs. Well, nope 😃
All those fancy UI elements are in fact just pre-rendered images that you need to supply yourself. Nextion UI framework is much simpler that one would suspect by just looking at demos. Basically, each element can be either this:
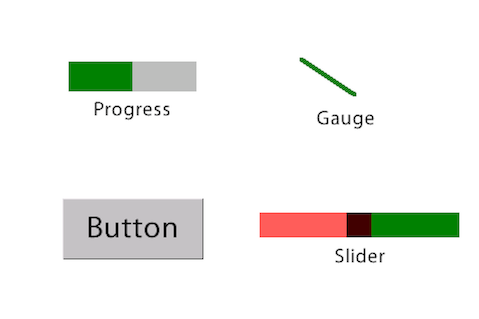
Or it can be any image you define. UI elements have some additional mechanics. For example, you can specify two button images for its normal and pressed states. So if you don't want your UI to look like the image above, be prepared to spend some quality time with image editor before you can actually start doing anything with the display.
For my thermostat project I decided to use an excellent collection of iOS themes for Home Assistant as a starting point. I carefully crafted my UI mockup and finally settled on this version:
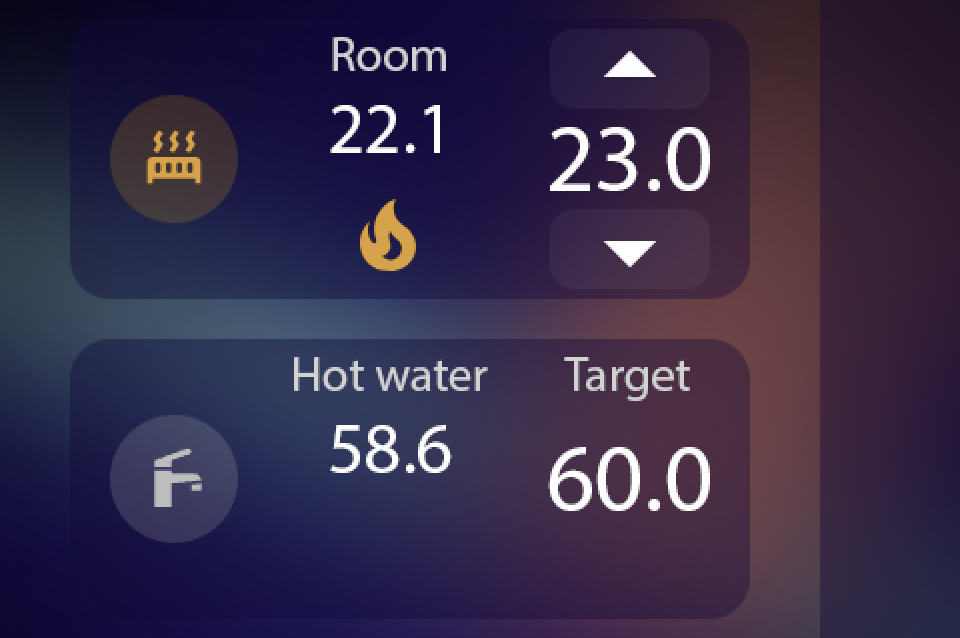
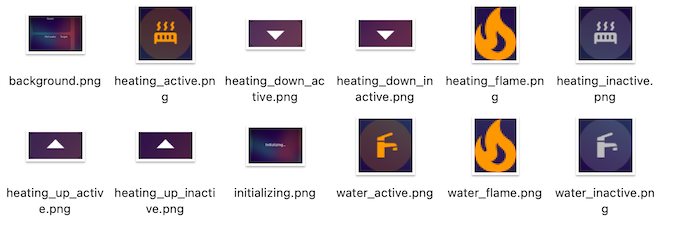
To everyone who contemplates embarking on a similar adventure I strongly suggest using image editor with layer support. Draw each element on its own layer; that way you can easily switch layers to bring your mockup to a desired state and then crop individual UI elements. If you have non-uniform background, you will have to crop each element along with its background, since Nextion doesn't support PNG transparency, and you will end up with several versions of basically same UI element:
Compiling display firmware
After I had my images ready, it was time to start building the actual UI for the display. Since I am using macOS, I had to jump through some hoops in order to use Nextion Editor, which runs on Windows only. I chose the option of running arm64 version of Windows 11 in UTM, and didn't encounter any problems with Nextion Editor so far.
First thing I did after creating a new project was generating some fonts. Nextion displays don't come with any preinstalled fonts, so that you can import any font you like. The process is pretty straightforward: select the desired font and codepage in Tools→Font Generator, save the resulting file and import generated font in Fonts tool window.
Next, I imported all my images using Picture tool window. Each image gets assigned a numeric id which we will use later.
I decided that I want my display to show initialization message while ESPHome boots and establishes proper connection with the display. So I renamed default page to init , set its sta property to image and specified the id of my full-screen initialization image. It's very important to visit the Event tool window and add the following script in a Preinitialize Event tab:
sendme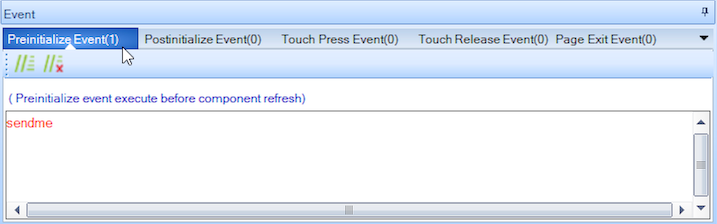
This will allow ESPHome to intercept page load event and use the on_page event. It's not mentioned anywhere in ESPHome docs, so be careful not to miss this if you want to handle such events.
Then I created a new page called main, activated it, set a different background and added the following controls (adding the sendme script as well):
- For central heating and domestic hot water I used dual-state buttons. They work like standard checkboxes and will allow me to switch CH or DHW on or off completely. I set their
staproperties toimageand supplied ids for active and inactive variants.
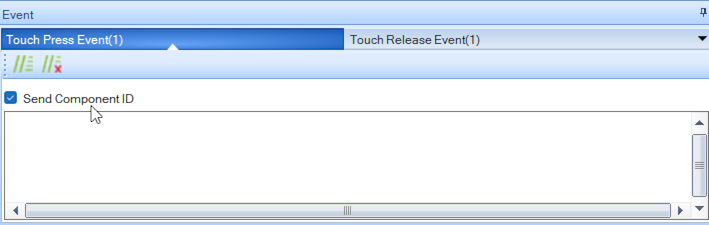
It's important to also check the “Send component ID” checkbox in theEventtool window, both forTouch PressandTouch Releaseevents. This will allow to process button press events with ESPHome:
- For all temperature values I used XFloat elements. They are really not straightforward, since Nextion doesn't actually support floating-point numbers. It emulates them by using integer numbers and inserting a separator at the specified position, which is defined by properties
ws0andws1. It took me a couple of YouTube videos to get to the bottom of this, but if you want to use fixed-point numbers with exactly 1 number after the separator, just setws0to0andws1to1as I did. It's also worth noting that Nextion doesn't support UI element transparency in a way that you would expect. I got around this issue with buttons by cropping my images along with their backgrounds, but another kind of workaround is needed for text elements. You need to emulate transparency by settingstaproperty tocrop imageand settingpiccproperty to your background image. Nextion takes your background image, crops an area corresponding to the coordinates of the text element and sets this cropped image to be text element's background. It's super convoluted and hard to understand, but you will get the desired outcome in the end. - For “Up” and “Down” buttons I used simple Buttons with
picandpic2properties set to images of normal and pressed states respectively. Don't forget to check the “Send component ID” checkbox for all buttons you plan on handling in ESPHome. - And finally for “Flame Active” icons I just used Picture components.
It's a good idea to give a meaningful objname to each component you plan to update or handle from ESPHome.
Finally, I switched to Program.s tab in the editor and changed baud value in default script generated by the editor.
int sys0=0,sys1=0,sys2=0
baud=115200
dim=100
recmod=0
printh 00 00 00 ff ff ff 88 ff ff ff
page 0
Most of this code is generated by default, but I increased baud rate to 115200 to be able to upload new firmware version by UART and not grow old in the process.
After all this was done, I compiled my firmware. Alas, the resulting TFT file wasn't placed in my project directory, and it took some googling to figure out why. It turns out, compiled firmware files are placed in some obscure directory in your AppData folder, and you can get them out by selecting File → TFT File output, choosing a different directory and pressing the Output button.
Finally I was able to copy my firmware to a FAT32-formatted SD card, place it into the display and connect it to power. Firmware installation is fully automatic and if all goes well, you can just disconnect your display from power, take out the SD card and get working firmware on the next power-on.
Integrating the display with ESPHome
Before starting out on this journey I combed through ESPHome documentation and discovered a built-in integration for Nextion displays. “Well, at least I won't have any problems on ESPHome side of things” — or so I thought. Unfortunately, the original author of Nextion component seems no longer interested in supporting it. So when something goes wrong you have the choice of either delving into ESPHome source code and fixing the bug yourself, or reporting the bug on Github, and — let's be honest — watching it grow old like a fine Italian parmigiano 🤌. And go wrong things did. But let's not get ahead of ourselves and start with the the basics.
Setting up UART
As I mentioned earlier, Nextion displays talk to the main device over UART using plain text commands. So the first thing we do is define a UART component:
## Nextion Display
uart:
  id: uart_2
  rx_pin: GPIO16
  tx_pin: GPIO17
  baud_rate: 115200
Here I declare a UART component that uses pins 16 and 17. Actually, you can use almost any GPIO pin for UART, but those particular pins were the most comfortable to wire on my prototype, so I went with them. These pins are default for UART2, hence the id. But you should know that ESPHome juggles hardware UARTs dynamically based on particular chip model and whether logger is enabled, so depending on the chip I actually end up with UART0 or UART1 on those pins. This is completely irrelevant in case of ESP32 as long as your chip has more hardware UARTs than you need.
The problem would be using software UART either on ESP8266 or when you run out of hardware UARTs on ESP32. Software UART doesn't work well on high speeds, so you will have to sacrifice the ability to update display firmware over UART instead of using the microSD card. But, as I will explain momentarily, even hardware UART will not save you from data corruption 😦
Declaring the dsiplay
Now we can declare our display component:
# Display
display:
  - platform: nextion
    id: boilotron_display
    uart_id: uart_2
    # touch_sleep_timeout: 60
    # auto_wake_on_touch: True
Basic setup is pretty straightforward. We give our display an explicit id and tell it which UART to use. You can also uncomment two lines that enable auto sleep and wake up on touch.
Moving data to and from display
ESPHome has a nice collection of specialised sensors for Nextion displays: numeric, binary, switch and text. The idea is that you declare one sensor per button or number that you want to control on your display, and things magically work in both directions: when you change a sensor in ESPHome, its value is sent to Nextion, and if value is changed on Nextion side, it gets updated in ESPHome.
My idea was to setup a sensor for each numeric value in Nextion display and let buttons change only the values on the display side. Then those values would be propagated to ESPHome like in a textbook MVC pattern. I would also be able to change ESPHome values from Home Assistant, and they would be propagated back to the display.
It's a nice and clean concept, and it almost worked. Unfortunately, sometimes data from display would get corrupted and I would receive weird values on ESPHome side. Since some values like CH setpoint get propagated directly to climate component, my whole thermostat would stop functioning. This would happen at random, even if no values were actually changed. I would have to add some hairy C++ code to each sensor to check every value that comes from the display, and even then it was unclear how to decide which values I should trust and which to discard.
It's a classic architectural problem, when you have two sources of truth and you need to constantly keep them in sync. If your sync mechanism fails, you are in trouble. The best solution in such cases is to eliminate all sources of truth except one. In my case that meant abandoning all those fancy sensors and adopting a different paradigm. I would only intercept events like button presses, process them on ESPHome side and then send updated values to Nextion unidirectionally. This approach adds a noticeable lag when seeing a result of a button press, but no data would be ever corrupted since we are not receiving actual values from the display.
Setting CH setpoint with buttons
I will demonstrate this approach on a single value, CH setpoint. It's deeply embedded into thermostat logic, so it's the most interesting to dissect:
- It can be set from Climate component in Home Assistant
- It can be set with buttons from display
- It should be displayed in
chsetpointcomponent on Nextion display. - It should be propagated to
climatecomponent in ESPHome.
In order to intercept button presses from Nextion, I used specialized binary sensor components for nextion platform:
binary_sensor:
  # Display buttons
  - platform: nextion
    page_id: 1
    component_id: 3
    id: display_chup
    internal: true
    on_press:
      then:
        - lambda: |-
            auto pid = id(boiler_pid);

            if (pid->target_temperature >= 30) {
              ESP_LOGD("nextion", "Reached maximum temperature");
            } else {
              auto call = pid->make_call();
              call.set_target_temperature(pid->target_temperature + 0.5);
              call.perform();
            }
  - platform: nextion
    page_id: 1
    component_id: 4
    id: display_chdown
    internal: true
    on_press:
      then:
        - lambda: |-
            auto pid = id(boiler_pid);

            if (pid->target_temperature <= 15) {
              ESP_LOGD("nextion", "Reached minimum temperature");
            } else {
              auto call = pid->make_call();
              call.set_target_temperature(pid->target_temperature - 0.5);
              call.perform();
            }
Here I define sensors for Up and Down buttons that control CH setpoint. Note that for this sensor you must use numeric component and page ids that you can look up in Nextion Editor. As you might remember, we enabled “Send component ID” checkbox in Nextion Editor for button press and release events, and this is how these binary sensors work. When Nextion event is received, ESPHome fires on_press event for a specific sensor. Both event handlers find the PID component, check for boundaries and update PID target temperature as described in ESPHome docs.
As you might've guessed, I chose PID component to be the single point of truth for CH setpoint. I just showed how its value can be changed with buttons from display. The same value can be changed from Home Assistant, so we get that requirement fulfilled for free. What is left for us to do is to just update the resulting value on display. We do that using on_control handler in PID component. It gets fired when target mode is changed, and that includes target temperature.
# PID
climate:
  - platform: pid
    id: boiler_pid

    # More PID configuration...

    on_control:
      - lambda: |-
          auto target = x.get_target_temperature();
          if (!target.has_value()) {
            ESP_LOGD("pid", "No value for PID target temperature");
          } else {
            ESP_LOGD("pid", "PID setpoint: %f", *target);
            id(boilotron_display).set_component_value("main.chsetpoint", (int)(round(*target * 10)));
          }
Here we get target temperature from PID component, check if it has any value and send that value to Nextion. Note that we get a float value from PID component, but Nextion doesn't support floats — it just emulates them using integers and some floating point shenanigans. So first I am multiplying my value by 10 (since I decided to use one digit after decimal point) and then round it and cast it to int. In this case I address my chsetpoint component by its fully qualified name, including page name main.
Adding Loading... screen
Now let's add some missing bells and whistles to this system. I would like my device to behave in a following way:
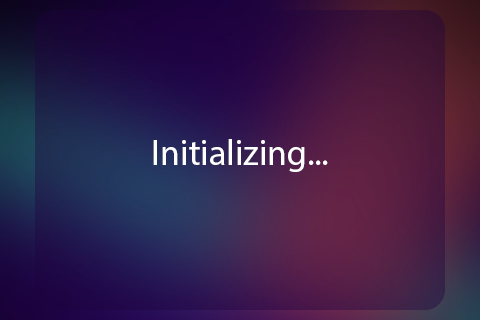
- Display a “Loading...” page on Nextion display while ESPHome boots up and initializes.
- Send current values for various temperatures and other stuff to display.
- Display the main page with all values present.
As you might remember, I added two pages in Nextion Editor, and all controls are placed on the second page, main. The page with index 0, which is activated when the display is turned on, contains just one fullscreen image:
In order to do things on boot, I used on_setup handler on display component:
# Display
display:
  - platform: nextion
    id: boilotron_display
    uart_id: uart_2
    # touch_sleep_timeout: 60
    # auto_wake_on_touch: True
    on_setup:
      then:
        lambda: |-
          id(boilotron_display).set_component_value("main.chsetpoint", (int)(round(id(boiler_pid)->target_temperature * 10)));

          // Other initialization

          id(boilotron_display).goto_page(1);
As you can see, I simply copy-pasted the code that gets CH setpoint from PID component and sends it to the display. When all initialization is done, I switch the page to main using goto_page method.
Conclusion
There are several other things that I would like to cover regarding Nextion displays in ESPHome, but this post is once again growing beyond any measure.
I hope that my experience with Nextion and ESPHome will help other people to save some time and avoid things that don't work. For me it was definitely a fun journey, which allowed me to refresh my C++ skills and contribute two bugfixes to ESPHome codebase 😄